Being a full-time remote worker during the pandemic (hopefully reflecting back on this decade in the future won't yield the question "which one?") the challenge of returning to the office (in my case, optionally) was embodied by the accumulation of tiny annoying barriers to mustering enough will to take action. While many of these were easily addressable, one that lingered was that of reestablishing familiarity with the office landscape.
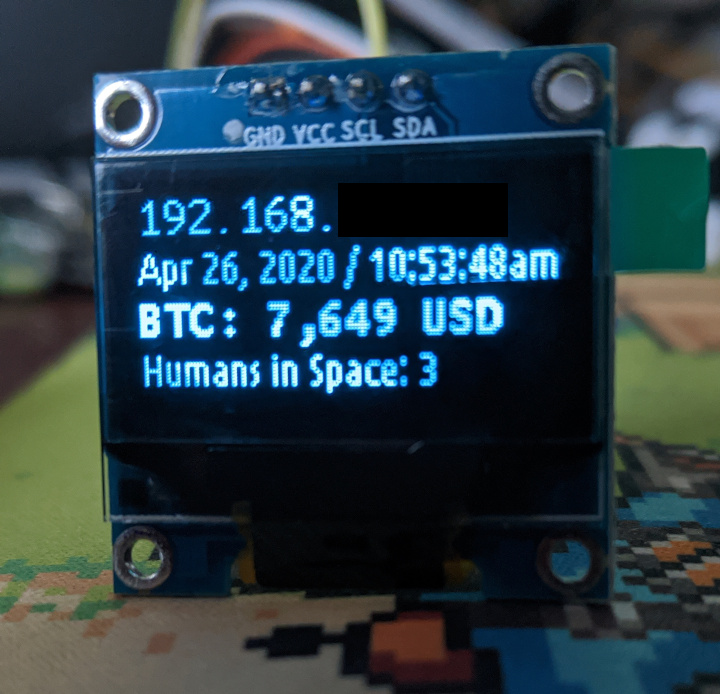
As it happened, I had, in April of 2020, constructed a Raspberry Pi Zero-driven display for my desk. At the time, it was intended to serve as a purpose-built display for conveying various information at a glance.
The Hardware
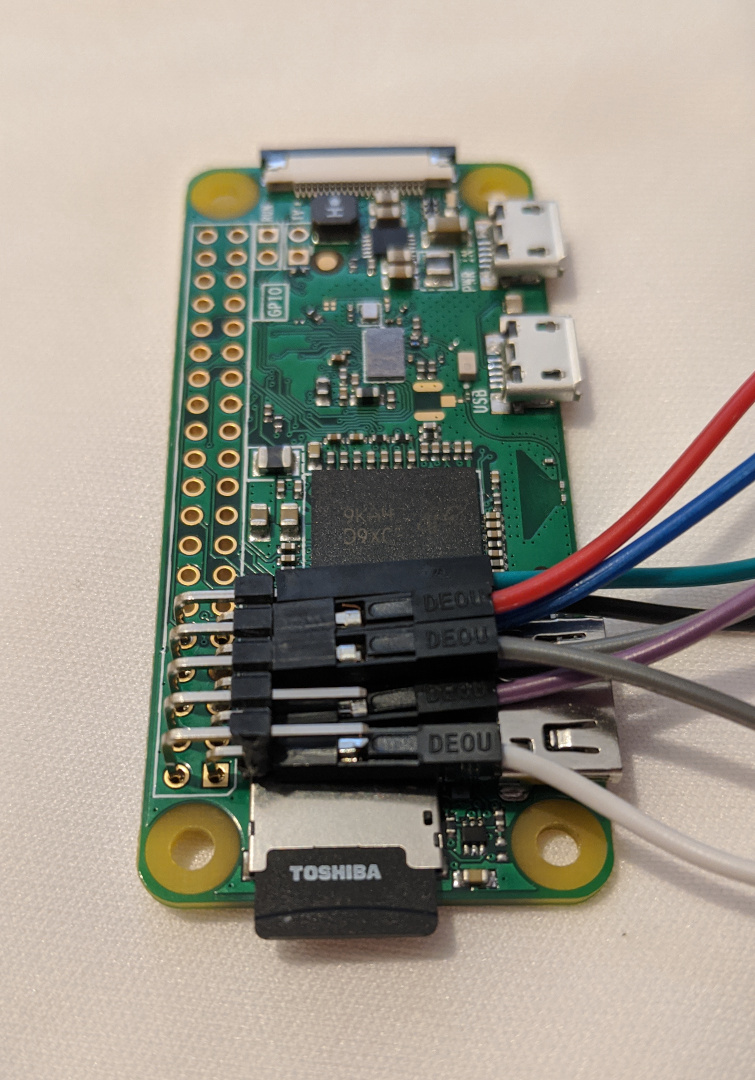
The Raspberry Pi Zero (model W, which comes with an onboard wireless chip) is a flexible, low-cost (I got mine for about $10), low-footprint (both physically, and in terms of energy consumption) computer for all kinds of DiY needs; it tends to be my go-to base for prototyping proof-of-concept projects that need to exist in meat-space.
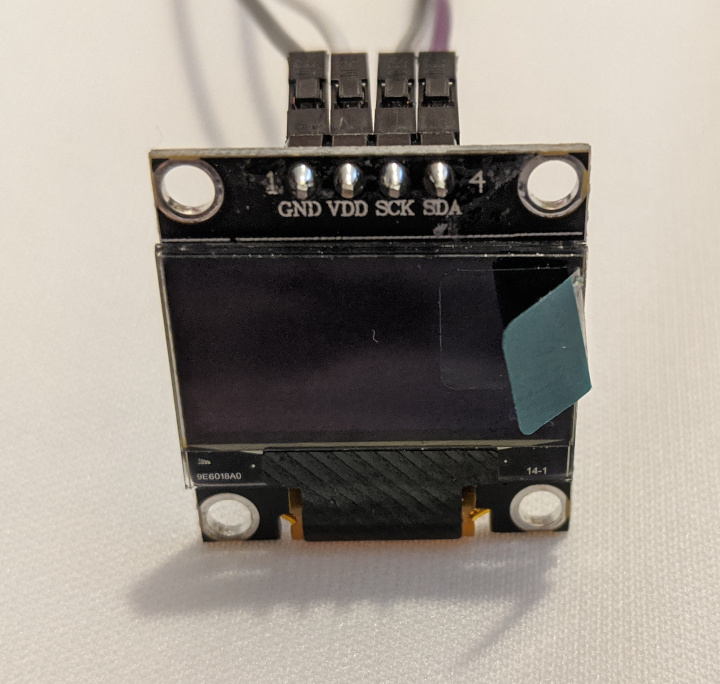
The screen I used was one of many I purchased from AliExpress; for only a few bucks I could get one of several configurations of OLED matrix displays, most measuring at about an inch in size. This allowed me to keep the displayed information present and readable, without taking up a lot of desk real-estate.
Around this time I had purchased several other solutions in need of problems components to extend the features and capabilities of my desk display. The first was the (actually somewhat helpfully named) DHT11; a common sensor for DiY enthusiasts. Once that arrived and was properly wired and reporting via the code I had written, I discovered the DHT22 which basically did all the same things a little bit better, at a marginal price difference. I had no need for the enhanced precision (or for the original temperature/humidity reporting really), but I ordered a couple units anyway, and added support for it in my code as well. Not long after that, I discovered the BME280, which did all that AND barometric pressure sensing, all at a smaller physical footprint (so of course I ordered those as well). With my non-existent temperature/humidity/pressure problem solved, I was done.
OR WAS I?
The unit on my desk at this point was performing admirably and with minimal fuss, but it still lacked... charm. I've previously spoken of my new-found love of 3D modeling and printing, so it was inevitable that my next step would be to design and print an enclosure. I wanted something that would take up as little room as possible, but still be visible and easy to power (the Pi Zero takes it's power from a 5.v micro USB port). And of course, it needed to look nice. I took a look online at some designs other people had come up with, but found nothing that sparked my interest.
It was at this stage that I began to consider the possibility of a solution that would serve needs beyond my own. I had recently visited my workplace in person and it struck me that, despite having a literal map to the space, I still had a bit of trouble finding the desk reserved for me. At the time, my workplace had undertaken a number of precautions to keep employees safe, including social distancing, which extended to our desk placements, so even with nobody directly around me, it was hard to feel confident I had found the right desk.
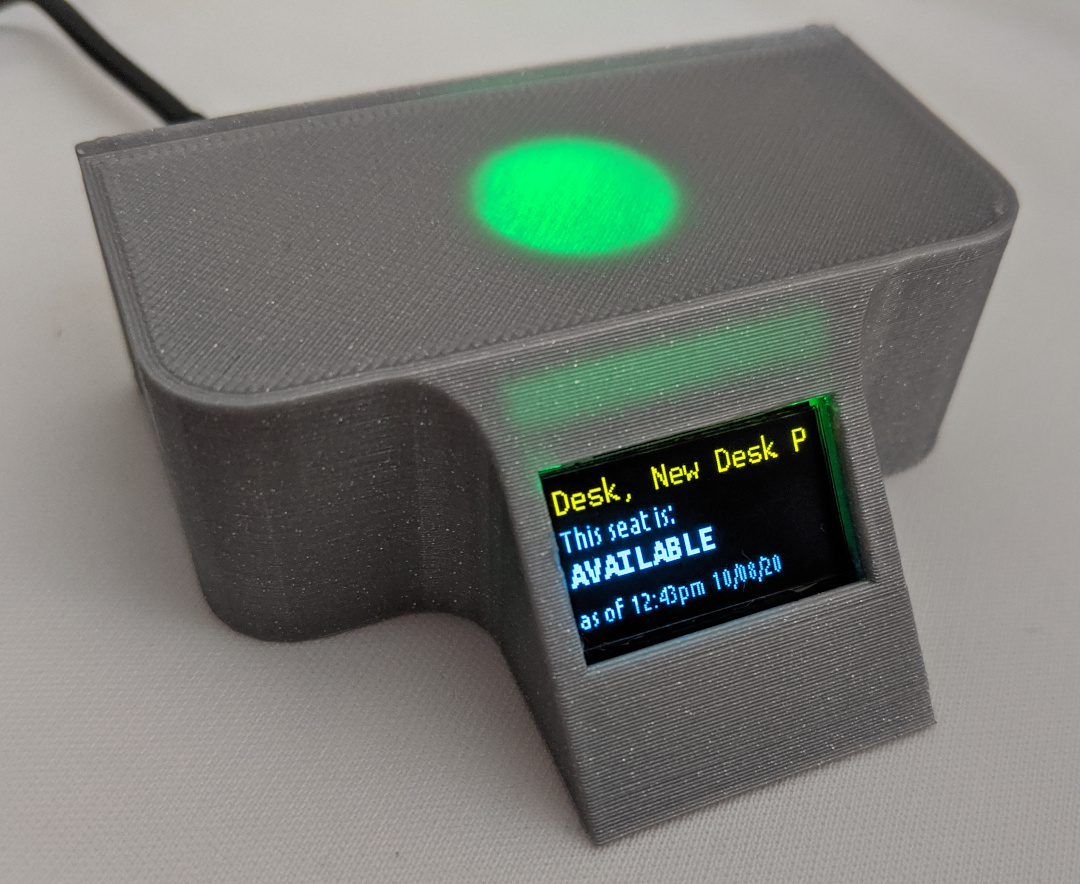
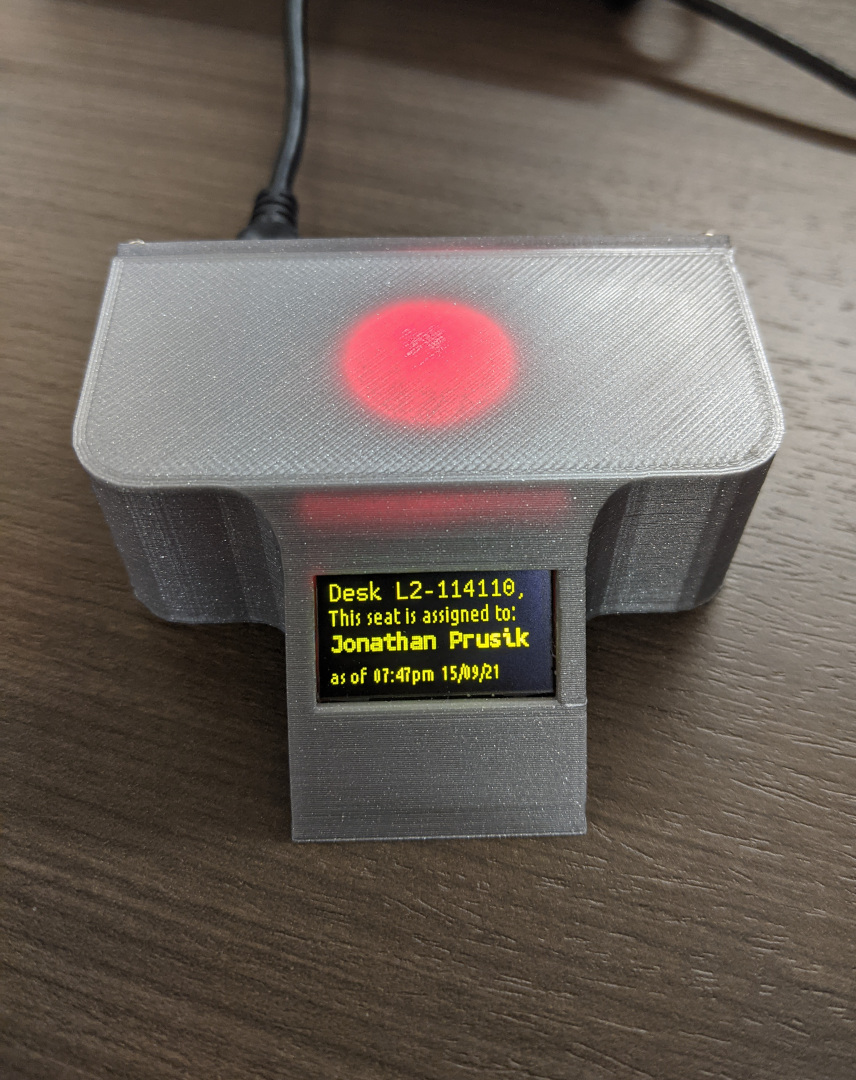
With this in mind as I designed my desk display enclosure, I added to my list of hardware expectations a single RGB LED. With four leads (one common and one for each red/green/blue color), I was able to programmatically turn the LED on or off or change the color however I desired. The enclosure would allow light to pass through at certain points to make the desk display visible from a distance. This enabled two helpful features:
- The unit could display a solid color based on its availability status.
- You could send a signal to the unit to make it flash, making it easier to pick out alongside other identical units.
Finally, I added support in my software for another fun component, the RC522, a (again, surprisingly inexpensive) module capable of reading at both RFID and NFC frequencies. In principle, this enabled reading employee RFID cards or NFC tags, but after putting together some working proof-of-concept pieces, I quickly discovered that supporting the range of configurations in use out in the world was a project all on its own. This coupled with the relatively large physical footprint of the board led me to exclude it from the model design (for the time being).
As for the model itself, I had a few considerations:
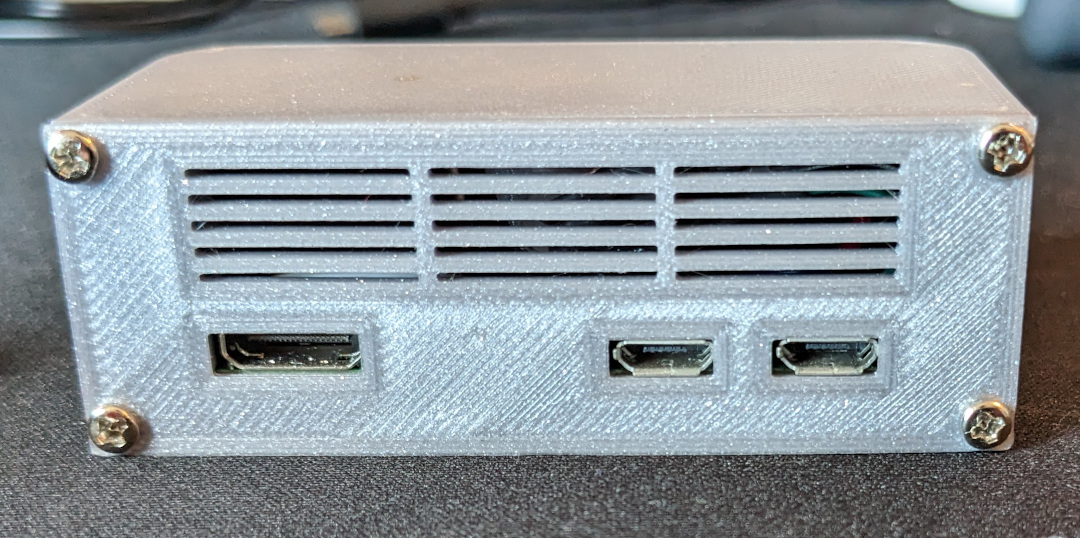
- The Pi Zero didn't need much, but it did need some ventilation to mitigate overheating.
- The ports (or at least the micro USB port for power) on the back of the Zero needed to be available to plug into.
- The LED indicator needed to be visible but not distracting to anyone sitting in front of it doing work. I tried to reduce the distraction from screen light by angling the display up for better viewing at a standing position rather than sitting.
- I needed to consider the limitations of FDM printing; namely, the orientation of the model when printing, which would affect the finished look, tolerances, and cost (both in terms of time and materials).
- The whole thing should be relatively stable and shouldn't fall down or tip over; for me, this meant a wide base and low center of gravity, with no dependencies on mounting surfaces.
Issues and Improvements
It took a while, but a few flaws with both the design and the components became evident pretty quickly. They weren't showstoppers, but they were certainly things I'd want to revisit.
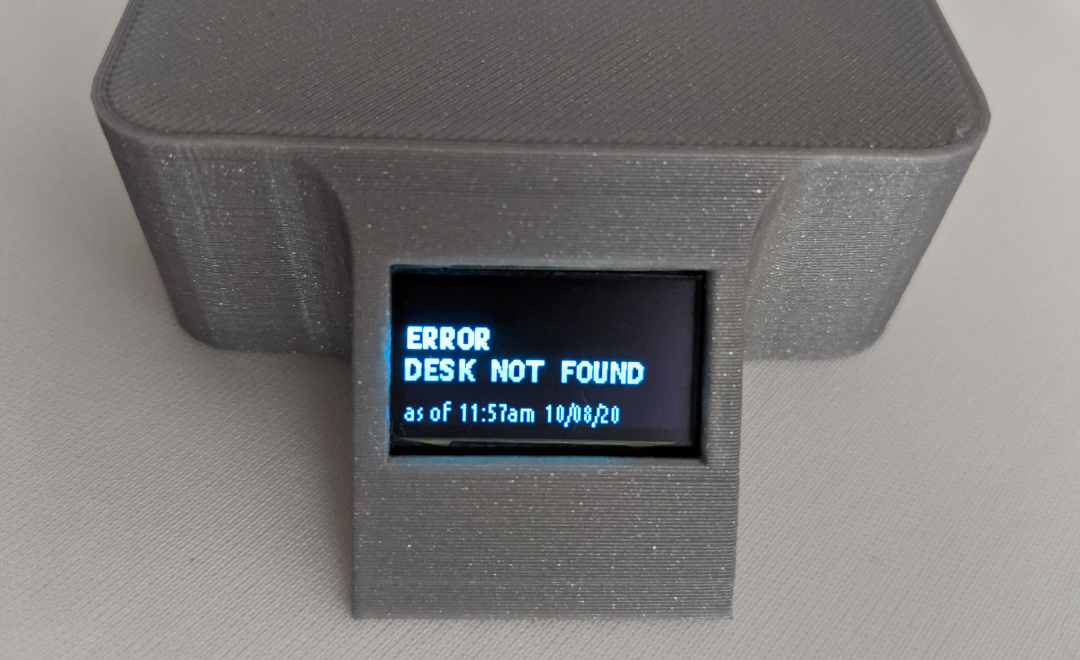
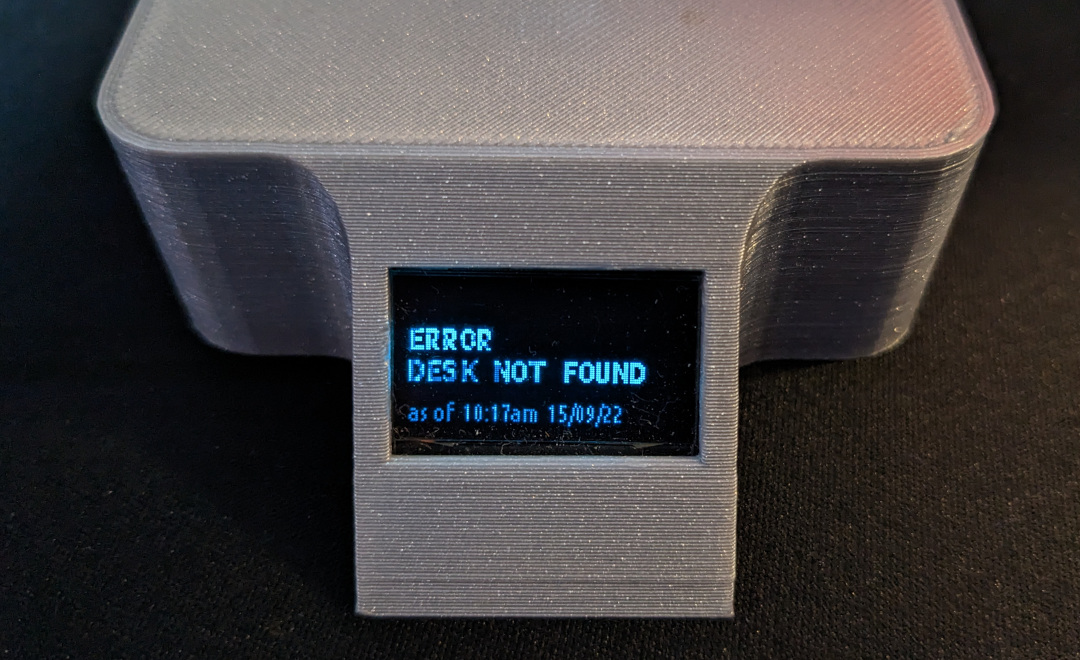
OLED. The OLED screens (especially these cheap ones using older OLED tech) are terrible for "burn-in". They do look great (and super sharp), but when the display content is static most of the time, burn-in is a real issue that becomes very noticeable the minute the content changes to something significantly different, and presents as "dimmed" pixels where affected.
| Before burn-in | After (~2 years) |
|---|---|
 |
 |
I could possibly address this with thoughtful software strategies (e.g. moving the displayed content at an interval or having the display go to sleep), but the right fix is probably a different kind of screen. Unfortunately, other screen types at the size are not nearly as cost-friendly, especially at scale.
Screen brightness. Despite my best efforts, the backlit displays are still a touch distracting if the unit is facing toward the desk seat. The OLED ones I used also "tracked" a bit with eye movement (likely due to the poor display refresh rate). An ideal solution would probably be to use e-ink displays, but at this point in time, they are the most expensive display option at this display size class. Alternatively, pointing the screen directly up (on top of the model) might be worth exploring.
Power. While the Pi Zero's energy requirements aren't high, I did have issues having them perform with consistency when plugged into, say, a desktop monitor USB port (or other shared power device). It took a bit of time to track various issues to this single root cause, but a proper power supply makes all the difference. That said, it does make it difficult to simply drop this into a work environment without careful thought to power.
Screws. More of a nitpick, but the use of screws seems unnecessary in retrospect. There are a lot of great design patterns (particularly from the discipline of woodworking) that could serve to lock the back panel in place while in use without additional fasteners. Failing that, nut inserts on the body, and countersinking on the back panel screw holes (so they don't stick out) would make the use of screws cleaner/more palatable.
NFC. Even without extensive support in my code, I'd like to work the RC522 back into the enclosure design for further experimentation.
Software. My code at the moment is pretty basic and serves a narrow use-case. For example, my code calls out to resources and updates the device accordingly. Having it "listen" for connections as well might be useful for orchestration needs; many IoT devices make use of a pattern whereby they (upon initialization) act as an access point for your administering device to connect to, then enter a "network mode" after you've configured the device settings to operate on the target network. The desk display also requires dependent environment variables to be set in a dotfile on the SD card in order to correctly identify the device/resources. This makes updating those values later a bit technical/cumbersome. Finally, the failure state (on power loss, for example) of the Raspberry Pi Zero can, in rare cases, result in SD card corruption and boot issues (and even when working properly, boot times are substantial).
Production at Scale
Additionally, I think there are a few interesting considerations and improvements I'd address if I were producing these desk units at scale:
- Microcontrollers. The first big change would be to shift to using microcontrollers. In addition to generally being cheaper and much more widely available than the Raspberry Pi Zero, they also have smaller physical footprints. Both the ESP32 and ESP8266 are well known and have broad Arduino community support and have been my go-to units for testing more recently (more on that in future posts). Lacking an OS, the failure state is cleaner, the operation more stable, and boot times more immediate. Beyond hobbyist chips, there is also the possibility of even superior price/performance with the production of a custom chip, at the right scale.
- Custom PCB boards. Wiring everything together with jumpers is great for the experimenting hobbyist, but when you've figured out your precise and unchanging needs, having custom PCBs manufactured in bulk is surprisingly easy and cost-effective. This helps eliminate slop, minimize the physical footprint of cabling, and establish more efficient and reliable assembly and operation. While we're at it, we can switch to SMD LEDs for even more space-savings.
- Enclosure materials. In addition to revisiting the enclosure design, taking a look at materials is worthwhile. FDM printing is great for prototyping, but scales poorly. Injection molding is probably a good-case for this and though it requires substantial starting costs, subsequent per-unit cost is quite low.
Okay, yes, now I'm done... maybe
On the whole, I am quite satisfied with this iteration. I ended up making four complete units which I (with the blessing of our office administrator) set up across two floors of our workplace. Of those, two ended up not having enough power to function properly, while the other two operated consistently for about a year and a half (before I decommissioned them for parts). I don't know if I will return to this for another iteration, but I've nonetheless gained some additional insights to consider if I do.