Update
This past weekend, I spent a hefty chunk of time trying to solve a problem I've been having for a while – recording video of my iphone and ipad screens to produce video demos via PC. After extensive research, I've been able to nail down three methods to record your IOS environment (with all the accompanying caveats):
Use a specialized cable and/or adapter
There are tons of configurations and apps to wade through when going this route, and all have different levels of functionality and reliability. The idea is to output video/audio from your device to a video capture card or otherwise properly equipped device. Even if you get the right cable for your hardware, you still have to contend with the myriad of apps which may or may not work with said cable on the particular generation of your iDevice and version of IOS. Because of the unmanageable variables involved with this method, I recommend against it.
Update (9-10-2012): If you do decide to go with an adapter, I'd recommend this HDMI adapter. There's nearly no lag, and the resulting image is crisp and clear. It's unclear whether it's an official Apple accessory or not, but it looks good, has a solid build, and best of all, works! Be warned though – apparently only newer devices support it.
On-device recording with Display Recorder.
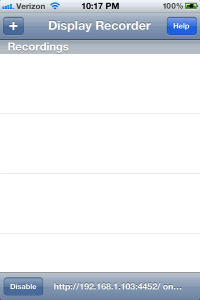
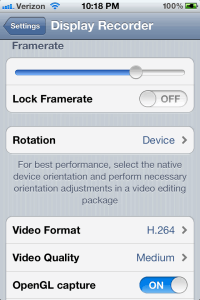
If you've jailbroken your device (you totally should), you have the option of recording from your device itself. There are a few apps in Cydia that achieve this, but the one most commonly recommended is Display Recorder, so I purchased the app for $5 and tried it out. The first thing I noticed was how easy it was to start recording – you just hit the + in the corner and you're off. The app also allows you to record in one of two formats: H.264/MOV or MJPEG/AVI. One important note: while you will have the option to record audio from the onboard mic, you will not be able to record the system audio. One way to get around this is to output your system audio to an audio recorder via the headphone jack and sync the video and audio later.
Despite this limitation, Display Recorder comes with some additional handy features as well. Not only does it allow you to adjust the quality settings of your video output, but it comes equipped with a built-in, unobtrusive, touch/gesture indicator, so your audience will have an easier time following along with your videos. When you're finished recording, you have the options of adding the video to your Camera Roll, uploading to YouTube, or downloading directly from your phone through a wireless network connection. For $5, Display Recorder is actually a very polished app, and it's a shame you can't get it in the Apple app store.
Wireless Screen Mirroring via AirPlay.
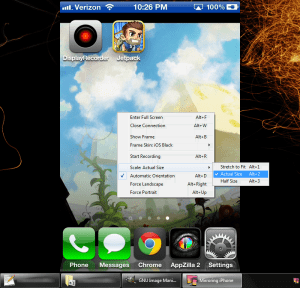
If you don't want to jailbreak your device, this is the way to go. The main limitation of this method is that it will only work on newer IOS devices (iPad 2, iPad 3 and iPhone 4S). There are ways to get around this with hacks or jailbreak, but that's a whole other ordeal. Anyway, you're basically taking advantage of the AirPlay screen mirroring functionality to display your IOS device video/audio wirelessly on your computer. When your device detects a compatible AirPlay host, the AirPlay icon will appear next to your volume bar. Tap it to select the host machine and turn the mirroring switch that appears to “On”. This is integrated into IOS, so there is no further configuration needed. While this means you won't need to download any apps to your device, you will need to run a program on the host computer. Maybe there are a bunch of Mac programs that let you do this (though it doesn't seem like it), but if you're using a PC like me, there are pretty much just two options.
Both allow image scaling, multiple device connections, and resolution specification (you can even display at a higher resolution than your device). Both also experience very slight image tearing on low-end host machines (or if you have a bunch of processes running in the background). The only real disadvantages to this method are the rare apps that don't perfectly support AirPlay display and the lack of a touch indicator. The latter is fixable if you use an app like Touch Pose (Free on Cydia – requires jailbreak); you can make your touch points and gestures visible for recording, just like Display Recorder. In any case, here are my impressions of the mirroring software options:
AirServer – $8 for PC / $15 for Mac
The Mac version of this looks much better, but the PC version isn't great (it's pre-release software) and only offers support for audio in the alpha build. The displayed image plays at the same average framerate as its competitor, but with significantly more scaling artifacts. There's no built-in recorder, so you have to use a program like Camtasia or Camstudio to capture the output. About the only thing it has going for it right now is a nicer website and a cheaper license.
Reflection.app – $15 for PC & Mac
This is definitely the better of the two options. Not only is the display image smoother when scaling, but the interface is cleaner, includes full audio support, and even a built-in screen recording tool. The operation is very slick and responsive enough that even speed/reaction games are very playable on bigger screens.
iDemo – $18 for PC & Mac
I may have lied a bit earlier when I said there were only two options. You can use iDemo as well, but I wouldn't recommend it. Among it's deficiencies: no audio support, poor image quality, extremely low framerate, no built-in record function, requires a jailbroken device, and a helper app like Display Recorder running on the iDevice (it's basically a VNC client). Why even mention it then? Well, this works without AirPlay, so you can use this method on older devices that otherwise don't support wireless mirroring.
Conclusion
Overall, I found mirroring and recording via Reflection.app to be the most pleasant, straightforward experience for capturing my IOS environment. I also enjoy the added benefit of being able to play games smoothly on larger screens (PC HMDI output to a 50" TV is damn impressive); it performs well enough to play quick-reaction games like Temple Run and Jetpack Joyride without trouble.
Below I've included a handy feature comparison matrix for quick reference, as well as short sample clips using each method of recording.
| Program / App | Cost | Jailbreak Required? | Records System Audio? | AirPlay? * | Format Output | Sample File ** |
|
Specialized Cable / Adapter
(One example) |
Varies
($15-$50) |
No | Configuration Dependant | N/A | N/A | N/A |
| Display Recorder |
$5
(Cydia) |
Yes | No | No | H.264/MOV or MJPEG/AVI | Download |
| AirServer |
$8 for PC
$15 for Mac |
No | Limited Support | Yes | N/A | N/A |
| Reflection.app | $15 for PC or Mac | No | Yes | Yes | MP4 | Download |
| iDemo | $18 for PC or Mac | Yes | No | No | N/A | N/A |
* (Requires Bonjour. Newer IOS devices only)
** (Samples files produced with the program's default settings)
A final note: If you are an IOS developer, you can use the IOS player in the SDK to simulate an iDevice. I left this method out however, since it's not available to most people.


